
Blackletter calligraphy looks neat, and what would look even neater would be an embossed stamp from some blackletter calligraphy. So I photobashed some letters I liked from online, traced them into an SVG, and then (a)I, created a python script to create plates for embossing/debossing the design.
The monogram is "MP" in a dense blackletter style — the kind of letterform that looks like it belongs on a medieval manuscript or a very serious beer label. The letters are drawn as stroked paths in an SVG, which means the geometry is a centerline with a width, not a filled outline. That distinction matters a lot for how the dies get generated.
The core idea is simple: take the centerline paths from the SVG, extrude a triangular ridge along each one, union all those ridges onto a flat plate, and you have the male (embossed) die. For the female (debossed) die, mirror the design and subtract matching grooves into a second plate. Press paper between the two and you get a blind emboss.
The tricky part is the geometry. Stroked paths need to be expanded into 3D solids, and the joints at corners and curves need to be handled cleanly or you get self-intersecting meshes that boolean operations choke on. I ended up using miter frames at each vertex — computing a bisecting normal scaled by 1/cos(half-angle) — and clamping extreme miters to avoid spikes at sharp angles. manifold3d handles the boolean union/difference operations; it's dramatically more robust than OpenSCAD/CGAL for this kind of messy geometry.
The SVG paths are arc-length sampled (not uniform-parameter sampled), so curves get evenly-spaced points regardless of how a tool encoded the bezier. A few passes of Laplacian smoothing clean up any jitter before the 3D geometry is built.
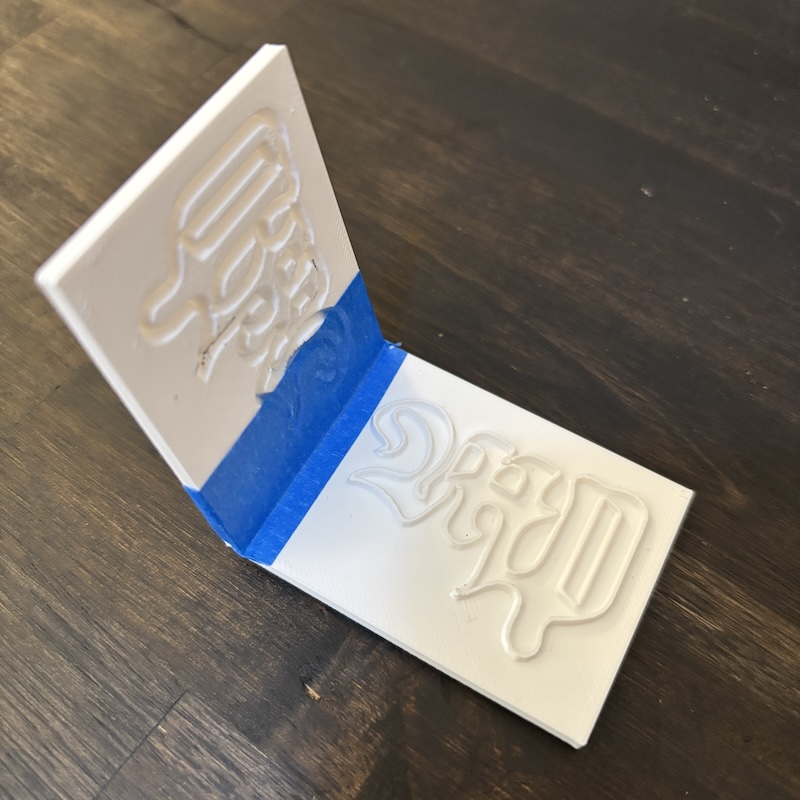
Here's the printed pair of plates — male die on top, female die on the bottom, held together with blue tape to test alignment:
And here's what it looks like pressed into paper:
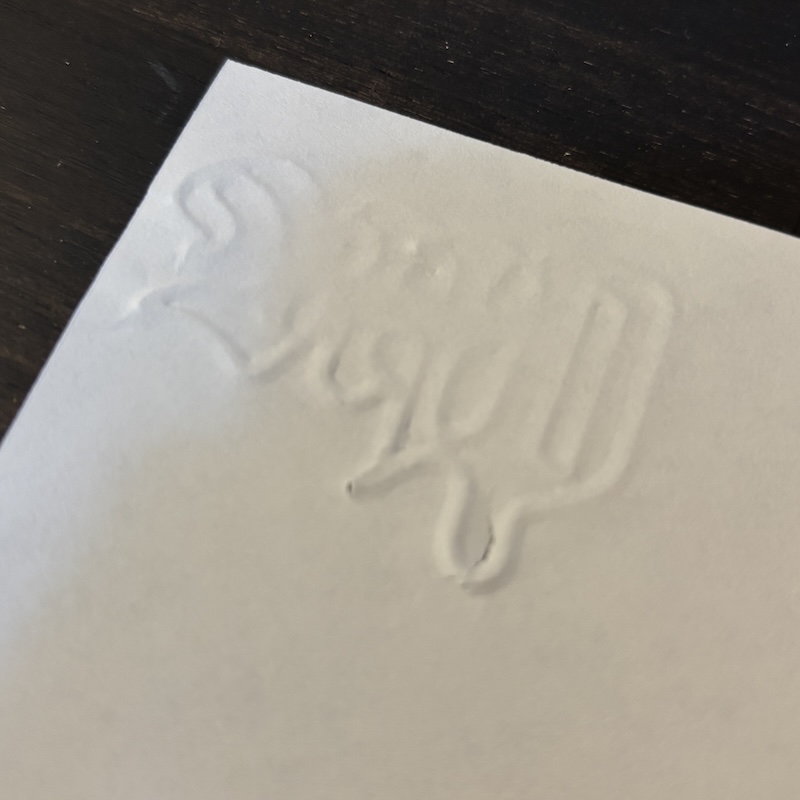
The emboss is clean and the letterforms read well. The triangular ridge profile gives a nice crisp edge to the raised paper rather than the rounded shoulder you'd get from a hemispherical cross-section.
The script takes an SVG file and outputs two STL files ready to slice and print.
pip install manifold3d svgpathtools numpy
python make_embosser.py <input.svg> [options]
| Option | Default | Description |
|---|---|---|
--plate-width |
100 mm | Width of the plate |
--plate-length |
80 mm | Length of the plate |
--plate-thickness |
3 mm | Plate thickness |
--stroke-width |
1.0 mm | Ridge base width |
--emboss-depth |
1.5 mm | Ridge height / groove depth |
--margin |
5 mm | Margin around the design |
--tolerance |
0.35 mm | Extra clearance on the debossed groove |
--samples |
200 | Points sampled per subpath |
--smooth |
2 | Laplacian smoothing passes |
--max-miter |
3.0 | Miter scale clamp at sharp corners |
--out-embossed |
embossed_plate.stl |
Output path for male die |
--out-debossed |
debossed_plate.stl |
Output path for female die |
The settings used for this monogram:
python make_embosser.py MP_blackletter.svg \
  --stroke-width 1.5 \
  --emboss-depth 2 \
  --plate-width 60 \
  --plate-length 48 \
  --tolerance .45
The higher tolerance (0.45 vs the 0.35 default) accounts for FDM dimensional variation — tight enough that the plates register well but loose enough that they don't bind.
I tried using openscad to do this, and got some results, but when I was trying to get fancier to get sharper edges I kept running into geometry errors in the solver, it would show a preview, but couldn't actually generate the final results; thus the python program to do it instead.